mmmm amstel light and shredded lettuce, lol
nice work bro!
From the expectations Jaywallz laid down for the tourney at Quabog and a leotard showing, gotta make sure I maintain my figure dont want to dissappoint him!!!! hahahaha
lmao!!!
For the record that is a site i neva want to see!!!
My bet is Dan would be fishing alone that day if you showed up like that.

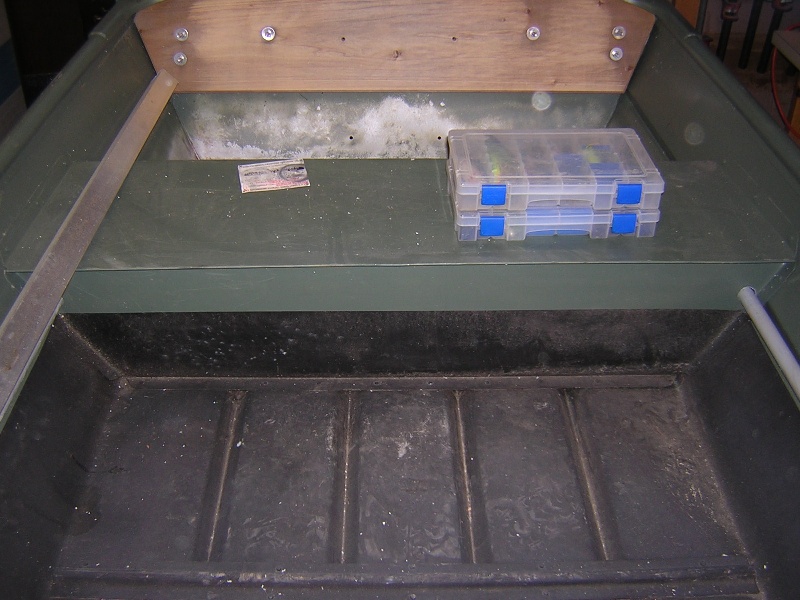
Alright guys, was busy with "actual" work friday and most of today. Did manage to squeeze in an hour or so and began work on the stern section of the boat.
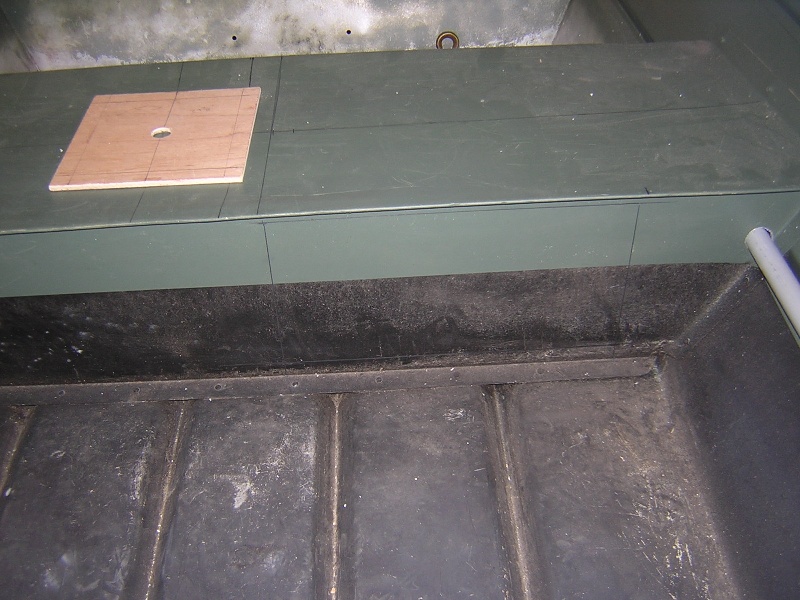
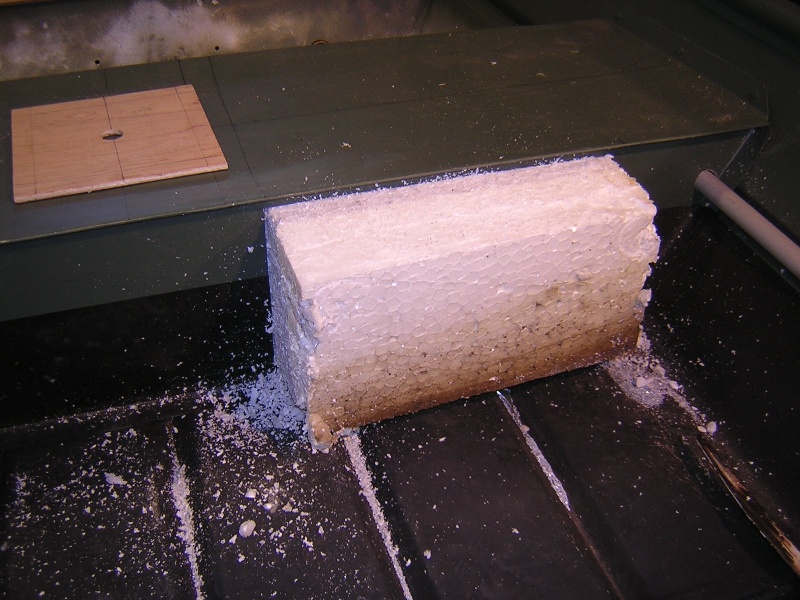
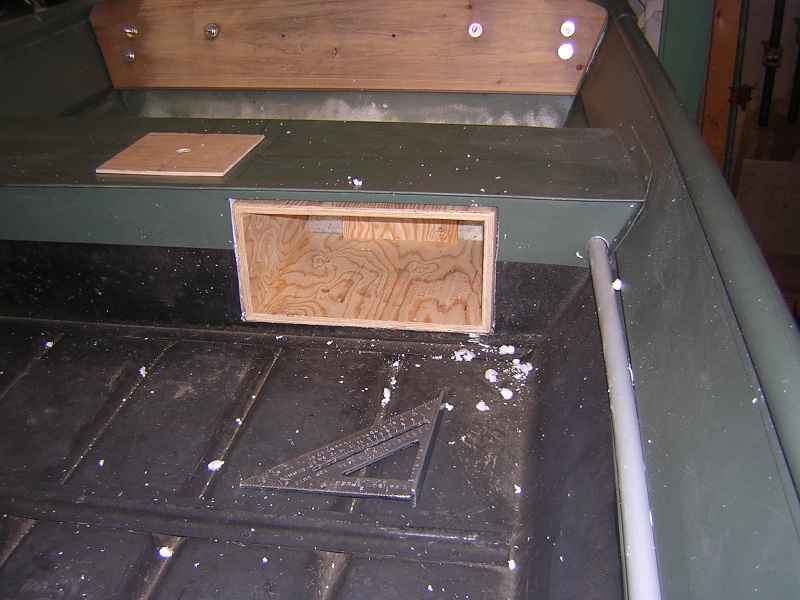
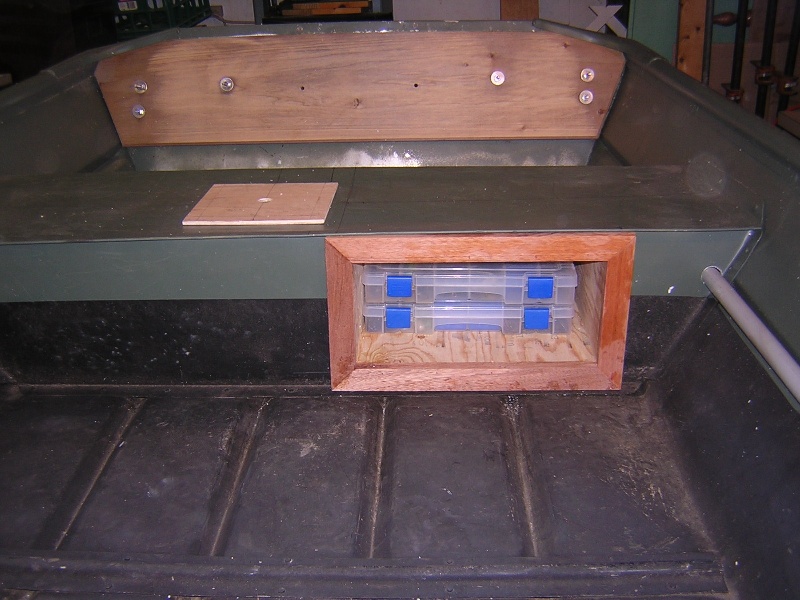
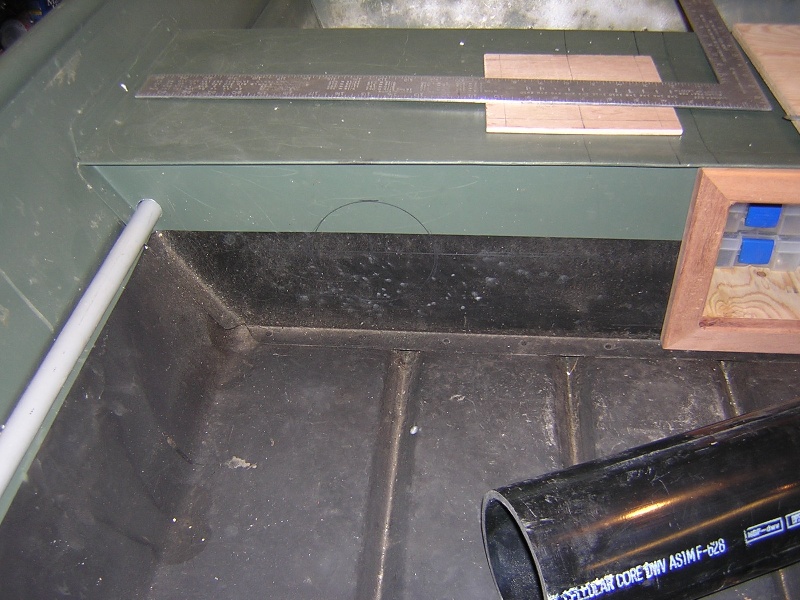
This is going to receive a "deck" job as well, but on a much smaller scale. The first order of business is gaining access to the inside of the seat. Now I have done this before by using a 4" holesaw thru the back and then after attaching the seat post, I rivet a piece of aluminium over the hole. Simple, clean, and effective, nowadays however in my ever growing quest to build the "Ultimate" jon boat I turn this into an opportunity to add more storage. I sized the compartent to hold 3 plano boxes stacked vertical, as this is the optimal configuration. They will be held in with a small bungee stretched across, and Im debating wether to paint the whole thing olive green, or leave the face frame mahogany. Those actually taking the time to read my dribble,lol, will notice on the layout that I offset the seat post 3" to the starboard, the reason for this is simple, the tiller on an outboard is on the port. Makes for a more comfortable seating position when under way, never found it to adversely affect balance, besides have your buddy move more to the other side of the boat when under way!!
Hopefully tomorrow I will get a little time to throw at it, if I can I'll be adding another seat storage trick to this rig. Enjoy!!
Ohh and because of the way I laid out and cut my deck (ie: NOT lay and trace) I was left with a cutoff of plywood that was big enough to make the box, the mahogany is the cutoffs from the transom board..... total material cost on this mod so far $0.00!!!
-On 2nd thought...there are NO 'builds' like this on tin-boats...usually a couple "step" photos and a finished product...personally, until this thread came along I'd been resorting to YouTube® videos on the subject....might I suggest "building" your OWN website(you guys NEED one anyways)...BeaverFeverBaits.com or something?maybe? ...with a special section for jon-boat modifications...or a YouTube™ channel maybe?This would look COOL AS HELL in a "time-lapse" video...
Thanks again all of you for the positive feedback!! I hope this is gonna inspire some of you to go out and build your own jon conversion!!
I had an hour to play with this morning, and seeing how everyone seems to love all the storage so far, and despite the fact I wasnt gonna do this to this boat, I couldn't resist, I figured I'd share one more little "Mod". I am dedicating this one to BangBang.....
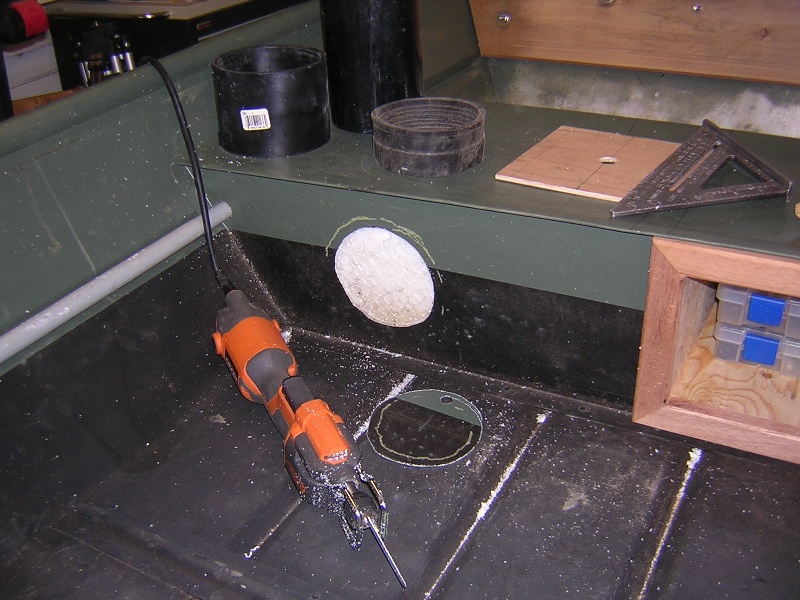
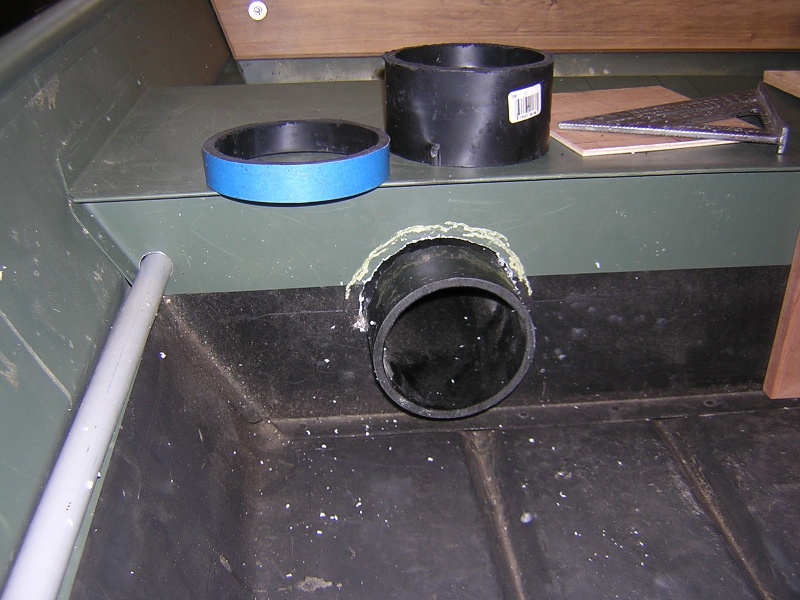
After making the cabinet on the port side I was left with some usable space on the starboard face of the seat. I have done this in the past on several boats, in this case I could only fit one, on other boats I stack them in a group of 2,3, or 4. This is one of the cheaper mods to do as 1 tube runs about 15.00 in parts, I'm sure most of you know a plumber so you may be able to get them for free!!
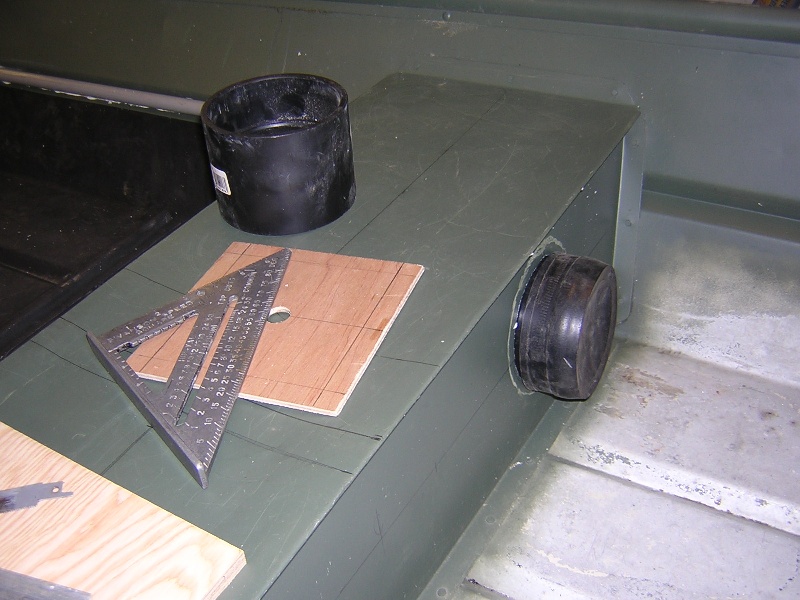
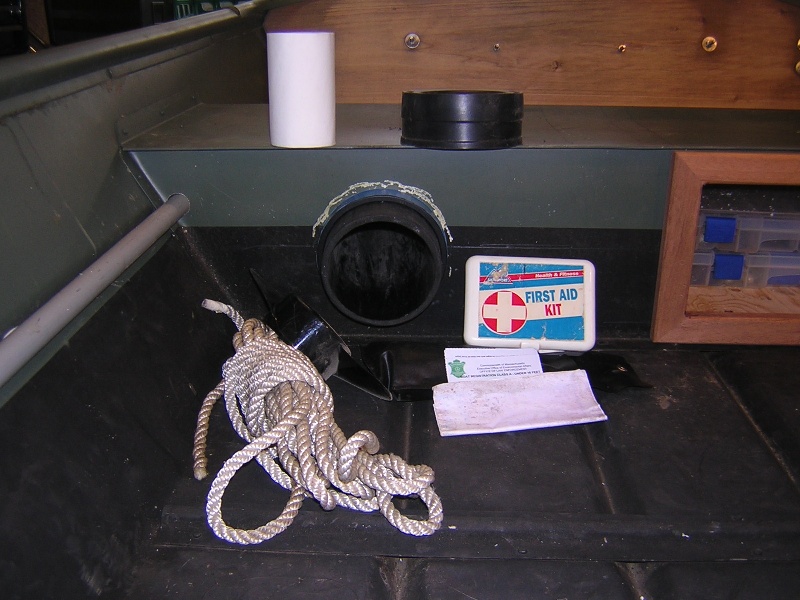
I use 4" ABS as it is lighter then PVC, after laying out the hole on both sides of the seat (FROM THE CENTER!) I either use a 4 1/2" hole saw or in this case a sawzall, to remove the aluminium, then a long blade removes the foam "core". Slip in the tube, on the back side I install a rubber cap, the band clamp was removed for mock up, it will be reinstalled on final build out. Then I take a coupling peice and using masking tape as a guide I cut off a 3/4" retainer ring.
TIP: Make sure to sand the inside of the ring so it slides over the pipe easily, it will be glued on during final assembly, but you dont want to fight it when sliding it on during glue up!
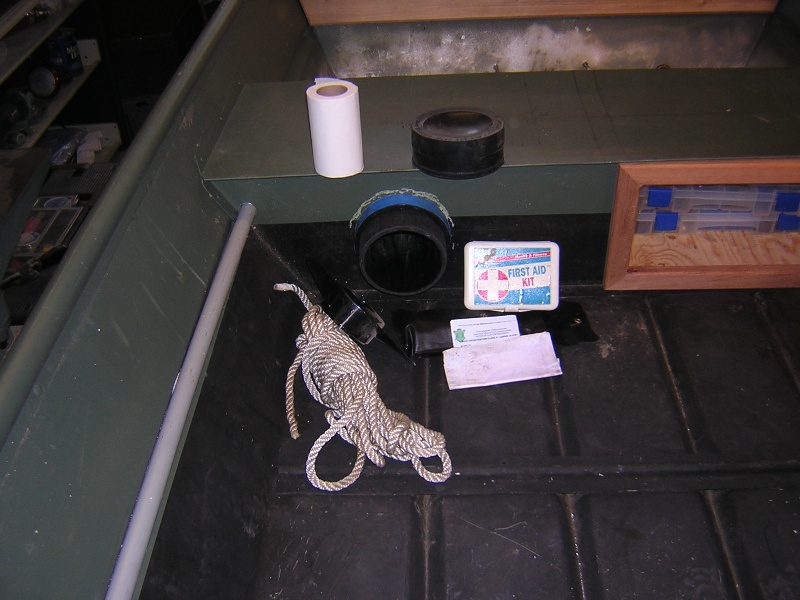
This retainer is then slid on and glued tight to the face of the seat. upon final assembly I will be putting a small bead of 5200 behind my retainer ring and pushing the whole unit tight, in effect bonding it to the seat face. All thats needed now is another end cap like I pictured. I prefer to use a test plug in most cases as it is easier to remove, but I happened to have 2 end caps laying around so I made due!! If you ever have to access the back of this storage unit, simply remove the band clamp from the back, and take off the cap . The retainer holds it in place when your "lidding" it up, and the back cap in conjunction with the 5200 holds it in place when your unliding!!. Best part is its totally waterproof!!
Now many may ask "What the hell am I gonna put in that??!!!", well believe it or not I use them for things like:
-Motor Tool Kit
-First Aid
-Fire extinguisher
-Spare Props and acc.
-Rope
-Boat reg and paperwork.... you get the idea....
And the number one thing this compartment holds and keeps dry....
You guessed it TOILET PAPER, which is why Im dedicating this mod to my tourney partner and cousin bangbang: for how many "emergency" stops we have had to make, I swear we are lucky to finish a tourney!!HAHAHA Good thing we are Family!! lol
Those with a "twisted" mind like mine can already see how I've used this same "idea" to make rod lockers in my jon boats.... those that don't, think center seat.... either side would do ..... I'll leave it at that!!
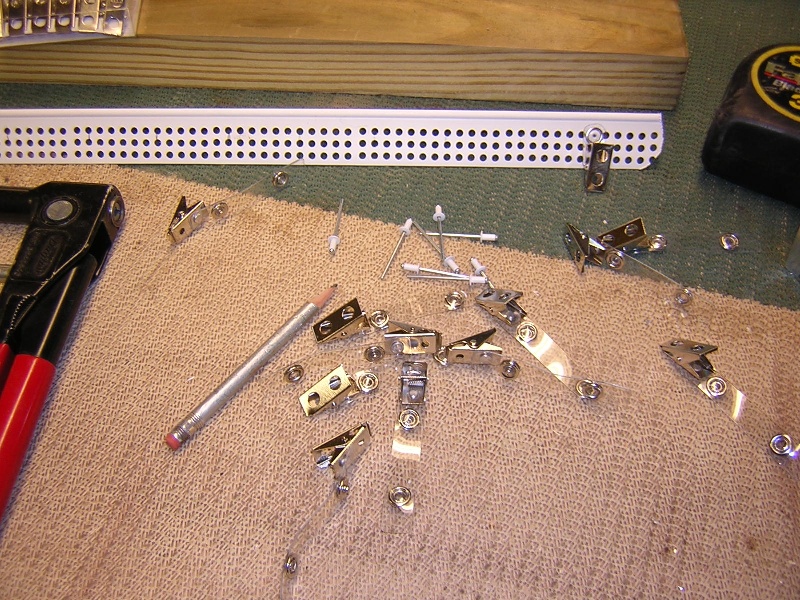
Well guys looks like this is gonna be a busy week with work!! Not sure how much time I can alot to the boat this week, did have a 1/2 hour to kill today, had picked up the stuff I needed at Walmart last night to make the following storage mod. I have seen this done in various ways on the internet before, but I figured I'd show you all how I make mine.
Parts Needed:
1 package 1/4" x 1/8" aluminium rivets: 1.60
1 package office badge clips: 1.67
1 piece vinyl corner bead: 3.50
2 zip ties and stainless pan head screws: 1.35
total: 8.12 call it 10.00
total: 10.00 + 404.00 = 414.00 spent so far!!
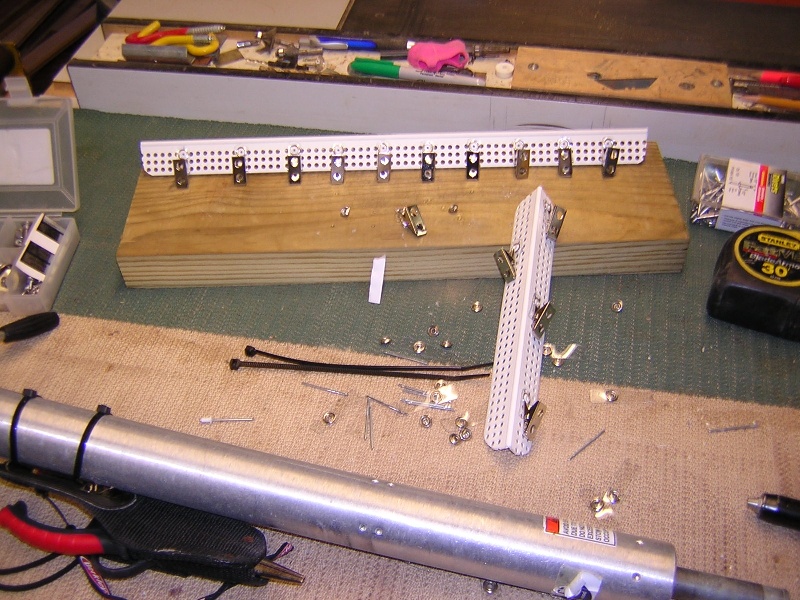
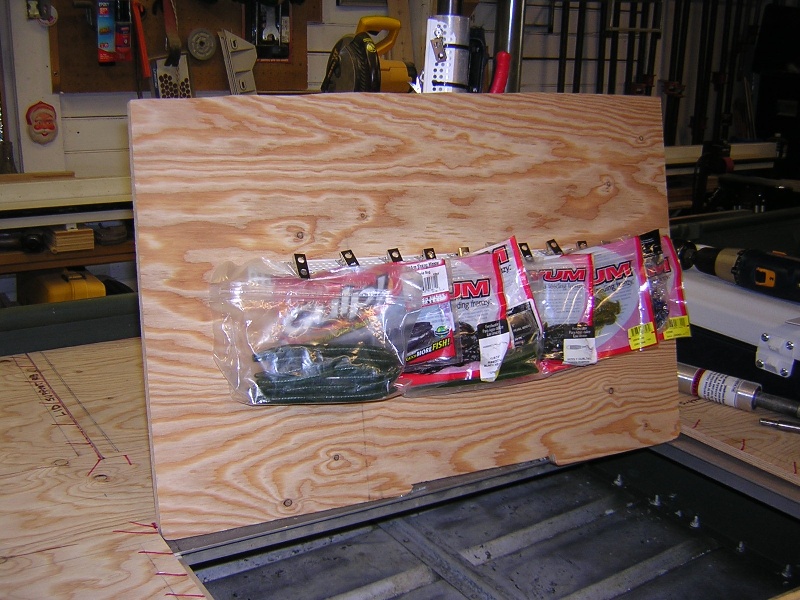
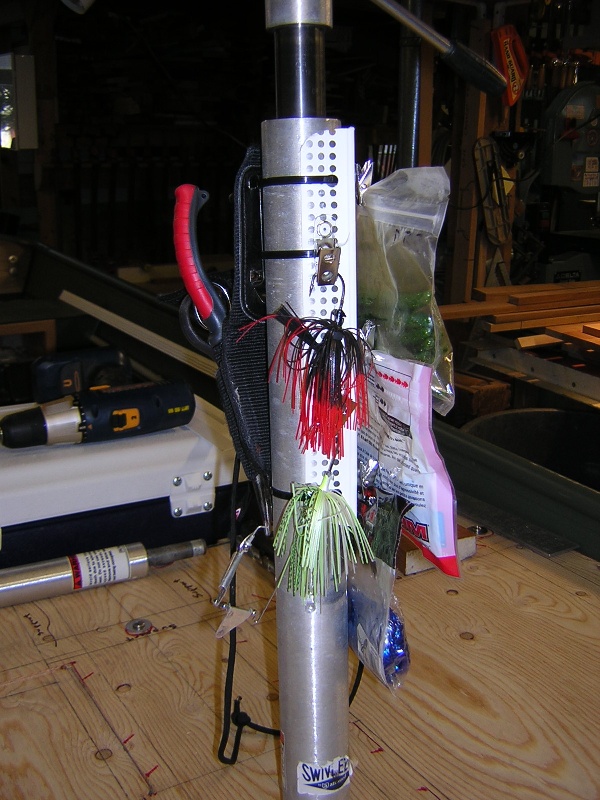
In this case I cut the corner bead into 18" lengths (This is dependent on the width of your hatch), I chose to space the clips approx 1 1/2" apart. I use an 1/8" drill bit to drill the snap closest to the clip out. Then I trim off the excess plastic strap with a pair of scissors. Next a rivet through the center and into the vinyl corner, note the orientation of the clips on the door version compared to the seat post version. Attach them to the underside of your lids to hang the soft plastics you use most often, I use the one on the post to hold whatever bait Im throwing that day, I simply zip tie it, along with my pliers, right to the post.
Im sure alot of you have seen this trick before, but like I said for those that haven't enjoy!!!
Thanks again guys for the compliments, Smoke good question, was hoping to finally field one!!
I definitely dont want to remove all the foam from the boat, it is there for a reason. In one of my earlier posts, when I modded the cooler for a livewell, the block of foam that was removed from there will be recycled to underneath the bow seat; there is plenty of room for me to refit the block under the front seat without impacting the storage area, and still retain 80-90% of the original block. As for the section that was removed for the stern seat cabinet, this will be reused/reshaped under the back deck to fit around the bilge and still allow it to operate. As for the foam that was removed for the "tube" mod , the additional bouyany provided by the cooler itself, I personally feel will offset any additional foam I may have removed. This is also why I take care in cutting out the foam, so that can be repurposed/reshaped to fit elsewhere in the boat. The less I can "mangle" it up when removing it the more useful it is to me later!!! Hope this answers your question, Ill be sure to include the new foam locations in my pics when I actually get to that step!!
I definitely dont want to remove all the foam from the boat, it is there for a reason. In one of my earlier posts, when I modded the cooler for a livewell, the block of foam that was removed from there will be recycled to underneath the bow seat; there is plenty of room for me to refit the block under the front seat without impacting the storage area, and still retain 80-90% of the original block. As for the section that was removed for the stern seat cabinet, this will be reused/reshaped under the back deck to fit around the bilge and still allow it to operate. As for the foam that was removed for the "tube" mod , the additional bouyany provided by the cooler itself, I personally feel will offset any additional foam I may have removed. This is also why I take care in cutting out the foam, so that can be repurposed/reshaped to fit elsewhere in the boat. The less I can "mangle" it up when removing it the more useful it is to me later!!! Hope this answers your question, Ill be sure to include the new foam locations in my pics when I actually get to that step!!
Now many may ask "What the hell am I gonna put in that??!!!", well believe it or not I use them for things like:
-Motor Tool Kit
-First Aid
-Fire extinguisher
-Spare Props and acc.
-Rope
-Boat reg and paperwork.... you get the idea....
And the number one thing this compartment holds and keeps dry....
You guessed it TOILET PAPER, which is why Im dedicating this mod to my tourney partner and cousin bangbang: for how many "emergency" stops we have had to make, I swear we are lucky to finish a tourney!!HAHAHA Good thing we are Family!! lol
Those with a "twisted" mind like mine can already see how I've used this same "idea" to make rod lockers in my jon boats.... those that don't, think center seat.... either side would do ..... I'll leave it at that!!
